 Learn Anything
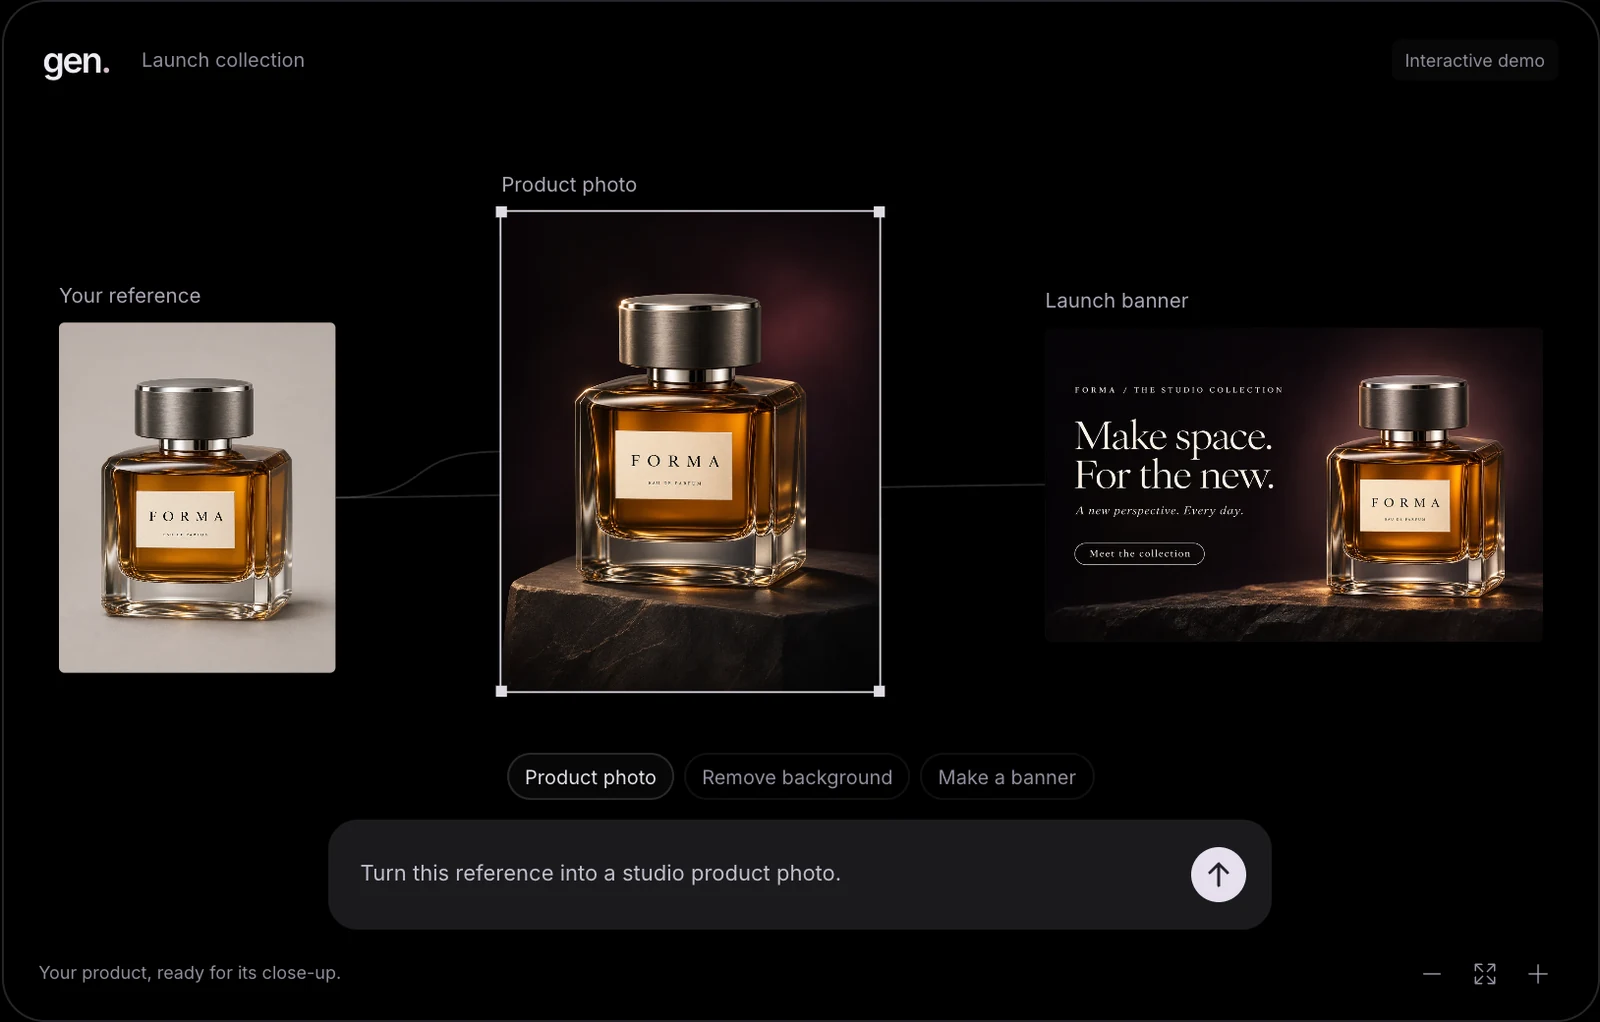
Gen.new brings AI chat, image generation, and a Studio canvas into one creative workspace. You can start with a product reference, describe the scene you want, and keep the reference and different versions together while you refine the result.
This guide shows how to use that workflow for a product photo and a matching promotional banner. It combines a reusable prompt exercise with screenshots of the real Gen website, so you can see the interface before trying it. No coding is needed.
Publisher note: Gen is another project from Learn Anything’s owner. This is a product walkthrough, not an independent review.
1. Get to know Gen.new’s workspace
The screenshots here come directly from Gen.new. The homepage has a particle orb and a prompt field for starting a conversation. Its public Studio showcase demonstrates a reference image, a product-photo treatment, and a matching launch banner side by side.
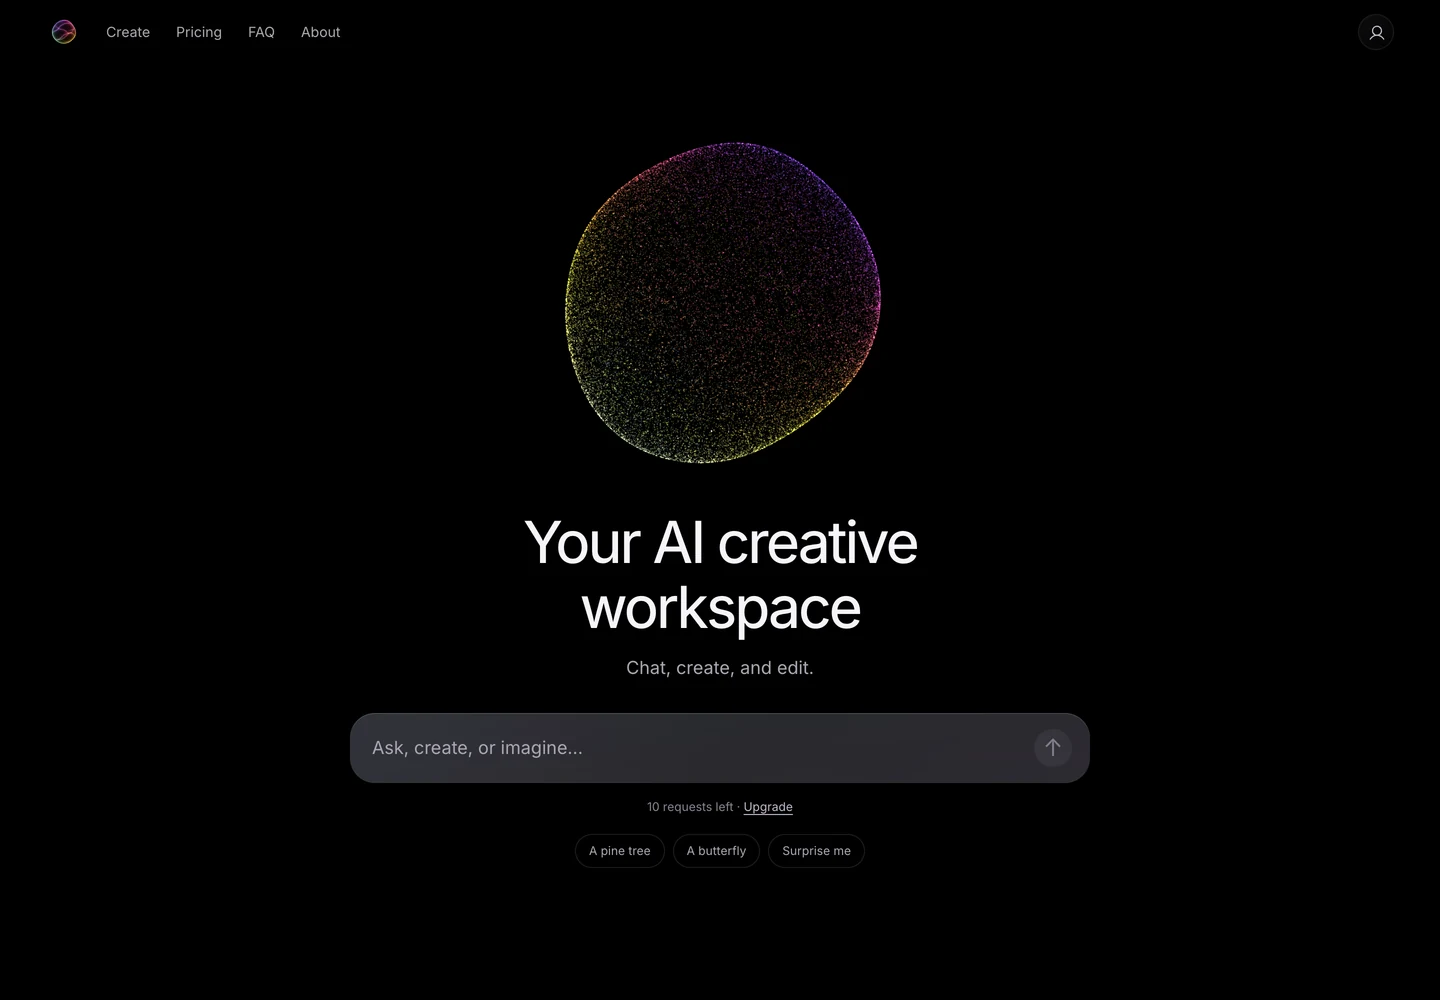
The full Studio is a canvas for arranging references and outputs. Chat is useful when you want to describe a task in plain language; Studio is useful when you want to compare visual directions and keep the project in view. Sign in when the app asks you to, then choose the workflow that fits your task.
For this exercise, stay with image creation and editing. Gen also offers other creative tools, but a product-photo project does not need a video or 3D generation. Model selection and generation use your available allowance; check the current plan details inside Gen.
2. Write a product-photo brief
Before generating, decide what the image needs to communicate. Use a product photo you own or have permission to use. For an easy practice brief, imagine a small ceramics shop that wants a calm, simple image of a cream mug for a product page. The screenshot above shows Gen’s existing perfume example; the mug prompt below is a separate exercise you can adapt to your own product.
- Subject: one cream ceramic mug, with its handle visible.
- Setting: a pale stone surface and a simple backdrop.
- Lighting: soft window light from the left.
- Composition: eye-level view, subject slightly right of center.
- Constraints: no lettering, extra objects, or invented logos.
This brief becomes your checklist. If you start by asking for something merely ‘beautiful’ or ‘cinematic,’ you have no clear way to decide whether the output solves your problem.
3. Add your reference and choose what to preserve
Text-to-image is useful for inventing a fictional object or exploring a visual direction. A reference image is more appropriate when an existing product, person, or composition needs to remain recognizable. Upload a photo you own or have permission to use, and say which details should stay unchanged.
An image generator can still change a reference’s proportions, colors, or surface details. A reference is guidance, not a guarantee of an exact copy. For a real shop listing, compare the result against the actual product before publishing. Use a conventional photo editor when exact product fidelity matters more than creating a new scene.
For the fictional mug exercise, a text prompt is enough. For a mug you actually sell, start with a clear, evenly lit photo and keep the original beside every revision. Avoid uploading private documents or customer information as visual references.
In Gen, attach your reference before sending the request. In Studio, you can keep the original on the canvas and select the image you want the next instruction to address. Say whether you want a new scene around the same product or a different product concept; those are different assignments.
4. Generate your first image in Gen.new
A practical prompt describes the subject, setting, light, composition, and constraints. You don’t need a long chain of quality adjectives. Start with the details that would help a photographer understand the assignment.
Create a square product photograph of one cream ceramic mug with a rounded handle. Place it on pale limestone against a warm off-white background. Soft daylight enters from the left, with a natural shadow on the right. Eye-level camera, handle visible, mug slightly right of center with generous empty space. No text, logos, flowers, or extra objects.
Use Gen’s product-photo starting point or enter the prompt in the app with your reference attached. If an aspect-ratio control is available, select square there as well. Start with one result, inspect it, and decide what to change before spending allowance on more variations.
5. Edit the selected result
Look at the first output before writing another prompt. Is the handle hidden? Is the lighting too harsh? Does the background compete with the product? Pick the most important problem and correct that alone. Changing the camera, subject, lighting, and background together makes it difficult to learn which instruction helped.
Use the attached image as the reference. Keep the mug, handle, camera angle, and lighting unchanged. Change only the background from warm off-white to a muted sage green. Preserve the natural contact shadow. Do not add text or other objects.
In Studio, select or attach the image you mean to edit before sending the next prompt. A request saying only ‘make it green’ could mean the product, background, or entire scene. Name the target and the details to preserve. Keep the original version alongside the revision so you can compare them.
6. Check the photo against your brief
An attractive image can still be the wrong image. View the result both at full size and at the size people will actually see on a phone. Use these checks to judge it against your original brief.
- Product: is there exactly one mug, with a plausible rim, base, and handle?
- Fidelity: if you used a real reference, did the shape, finish, and color stay accurate?
- Light: do the highlight, contact shadow, and background agree with each other?
- Composition: is the subject easy to recognize when the image is small?
- Artifacts: inspect edges, reflections, lettering, and repeated details closely.
- Purpose: does the image fit the intended crop and leave room for any later layout?
Save a promising version before making another edit. If a revision fixes the background but damages the handle, return to the saved version rather than trying to repair an increasingly distorted image.
8. Save what worked and keep learning
Keep a short record of your brief, prompt, selected model, reference, and most useful revision. Save the output you chose and note why it was the best fit. In Studio, keeping those versions together makes it easier to carry the same visual direction into the next asset.
For your next session, reuse the same brief and change just the lighting. Then try the same object with a different crop. Compare results side by side. These controlled exercises help you learn visual direction as well as prompting.
- Explore photography to understand light, framing, and perspective.
- Explore design to build your sense of hierarchy and composition.
- Explore generative machine learning to learn more about the ideas behind generative tools.
Common questions
What is Gen.new?
Gen.new is an AI creative workspace for chat and creative media, with a Studio canvas for organizing references and results. This guide focuses on its product-photo and image-editing workflow.
Can I try Gen.new for free?
Gen offers a limited free allowance and paid plans. Check the current allowance, model access, and prices on Gen.new before generating; each generation uses the available budget.
Do I need to know how to code?
No. This exercise uses plain-language prompts and optional reference images. Coding becomes useful if you later want to automate a workflow or integrate a model into an application.
Why does the image change when I repeat a prompt?
Generation can be stochastic. Some tools expose a seed that can make comparisons more controlled, but reproducibility also depends on the model, settings, and provider. Save the actual outputs you want to keep.
Can I use generated product photos commercially?
Check the tool and model’s current terms, your rights to any reference images, and whether the result accurately represents the product. An AI-generated image does not automatically clear trademarks, copyright, or other rights.
What should I learn after prompting?
Practice photography fundamentals, composition, and basic image editing. Knowing what makes an image useful helps you write better instructions and recognize when a conventional edit will work better than another generation.
Try it with your own product.
Bring your reference into Gen.new and build a visual direction you can keep refining.
Build on what you’ve learned. Browse the blog or find your next topic.